Shibori Stitch Resist
One of my passions is textile design. I don't get to do it enough these days, and I was thrilled to be able to take a natural dye class at The Workroom taught by Julie Sinden, a fantastic textile artist. This course blew my mind!!! I'm fascinated by process, and how people have figured out how to do the intricate techniques involved in so many crafts, so this class was right up my alley.
We used five types of dyestuff all found in nature, such as the heartwood of a tree, the roots of a plant, and a beetle!! It was amazing to see the colors that came out of this stuff. I want to share some photos to show the variety of colors, but also give you a small tutorial on how to create a beautiful textile using the shibori stitch resist metho
Here are some of the beautiful results, courtesy of mother nature. Based on the type of fabrics used and the method of fabric preparation before dying, you get a variety of hues, values, and tones for every single dye.
Cochineal - From a beetle.

Logwood - Heartwood from a Logwood tree.

Osage - shredded wood of a tree.

Madder - Roots of several plants and trees.
Now for the tutorial...
Shibori is tie-dye, as we know it in North America. It is a very ancient Japanese art form dating back to the 8th century. WOW! The fabric is tied, bound, folded, or twisted in various ways to create a resist so that the dye will only penetrate certain parts of the material, leaving behind a beautiful pattern. There are lots of different techniques that give a wide variety of stunning results.
Shibori is traditionally dyed using Indigo, which requires a bit of laborious preparation. It's an enjoyable and rewarding process, but if you're looking for a quick and easy alternative, acid or procion MX dye are both great options; however, they are chemical dyes.
The important thing is to use a dye that "takes" quickly to the fabric; this means that the fabric will not have to sit in the dye bath for a very long time and the water will not penetrate the resisted areas.
Each dye manufacturer will have different instructions for their products, and for that reason, I will only give directions for preparing the fabric to be dyed. I recommend that you follow the manufacturers instructions for the dyeing step. I've provided sources for dye manufactures that will ship to you...
Indigo Dye from Maiwa
Chemical Dye from G&S
_________________________________________________________________________________________________
Materials List:
- Natural fabric is required yardage (Cotton or silk)
- Pencil
- Upholstery thread or bell thread
- Hand sewing needle
- Desired dye ( I recommend indigo or acid)
_________________________________________________________________________________________________
Step 1 - Create your design
With a pencil, lightly draw a pattern onto the fabric. It can be any pattern. I created a grid of 2" x 2" squares, and sketched petals in each square to make a sort of geometric flower pattern. (Sorry for the faint lines!)

_________________________________________________________________________________________________
Step 2 - Create your stitches
1. Fold fabric along the lines of your design
2. Using the upholstery thread, sew a basting stitch through the two layers of fabric, following the sketch.
3 - IMPORTANT: Don't allow your stitch lines to intersect. If you are approaching a stitch and you are about to cross over it, end your stitch. Leave a tail of thread without tying a knot. You will use these thread tails to pull on in the next step.

_________________________________________________________________________________________________
Step 3 - Gather fabric
Now that you've finished the basting stitches, you'll have a lovely jungle of loose thread to tug on. Grab a glass of wine, and take this step one stitch at a time. Pull on the threads as tight as you can, gathering the fabric along the stitch. Tie a knot to secure each stitch tightly.


Look how small the piece becomes!
_________________________________________________________________________________________________
Step 4: Dip fabric into the dye bath
You will want to follow the dye manufacturer' instructions for dying.

Here's the little guy hanging out by the poolside!
_________________________________________________________________________________________________
Step 5: Remove stitches
Once dipped into your dye, you can remove all the stitches. This is the best part!

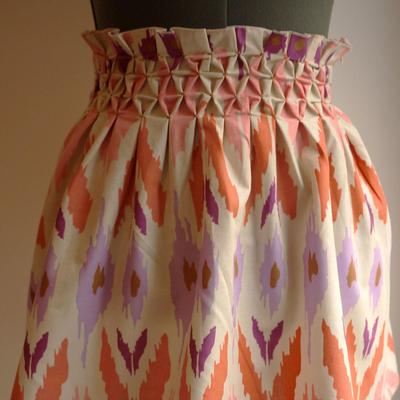
The front has a more crisp pattern, and you can see the stitch marks.

The back has a softer, cloud-like effect. I think both are pretty!
I plan to sew these up into cushion covers, but I have plenty more plans for pretty things to make. Tie-dye is back, baby!
YOU MAY LIKE:

1 Response
Leave a comment
Comments will be approved before showing up.
Also in DIY Tutorials

DIY Bucket bag

DIY: transfer clothing labels
Tora
September 01, 2021
I’ve read several tutorials on stitch resist and this one is the best. Very clear. I’m going to give it a try. Thank you!