
Hannah has an armhole dart, which is an unconventional dart placement that you might more often find in vintage clothing. I know you’re likely scratching your head about this one. Because of this dart placement, this bust adjustment tutorial may look a bit different to those you’ve seen before. These bust adjustments for the Hannah pattern will allow you to add or reduce fabric at the bust area, adjusting the dart size, all while maintaining the size of the waist and hips.
Here’s what we’ll cover in this tutorial:
- Selecting your size
- Determining your cup size
- Determining the amount to adjust your pattern
- Full bust adjustment tutorial
- Small bust adjustment tutorial
- Adjusting your apex
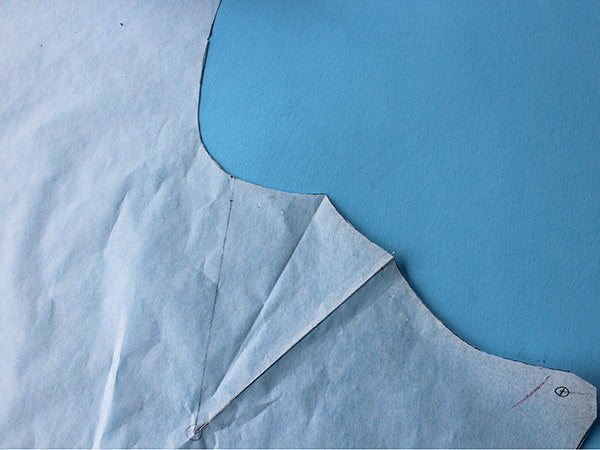
- Truing your adjusted dart
Let’s get started!

Selecting your size
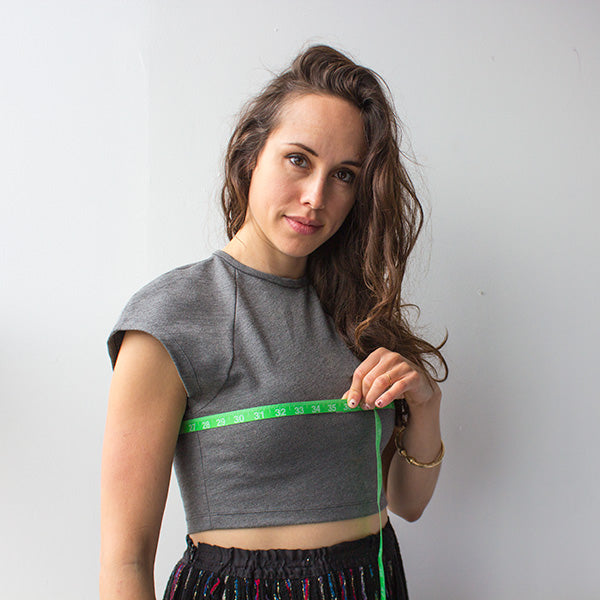
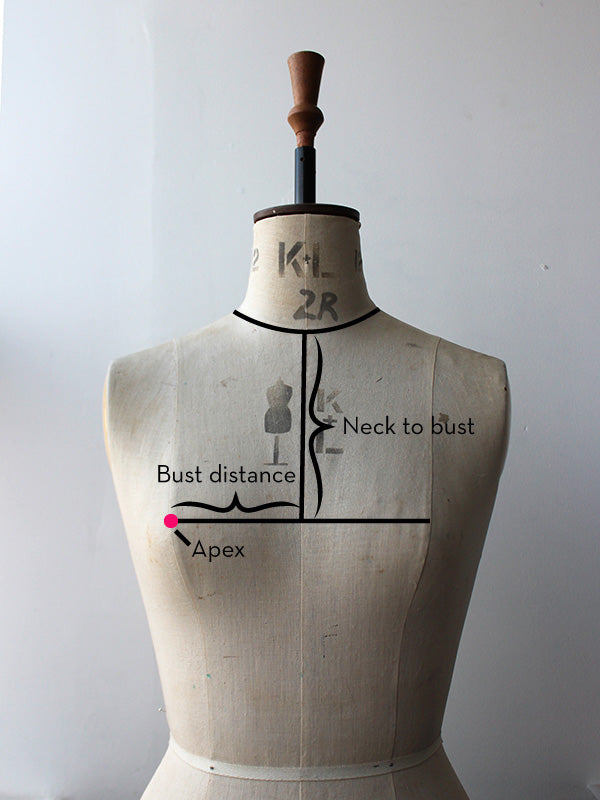
Hannah is made for a B-cup and has a wearing ease of 1 ¾”. To determine your bust size and cup size, you will need to take your high bust and full bust measurements.
After we take these two measurements, we will take note of the difference between them. This difference will determine our cup size and will tell us if we need to make a bust adjustment.
Take your measurements:
- Wear a well fitting bra while taking your measurements.
- Measure so that the tape is snug and make sure your fingers are not underneath the tape
- Measure your high bust: around your body, just under your arms, around your chest and upper back

- Measure your full bust: Around the fullest part of your bust with the tape parallel to the floor.
Determine your cup size:
Calculate the difference between your high bust measurement and your full bust measurement.
-
1” difference or less: This difference means that you are an A cup and will need to do a small bust adjustment. Select your bust size from the pattern’s size chart based on your high bust measurement. This will ensure that the garment fits properly in the neck and shoulders. Then you’ll make a SBA to reduce your cup size.
-
2” difference: This difference means that you are a B cup. You won’t need to make a bust adjustment and you can select your bust size from the pattern’s size chart based on your full bust measurement.
- 3” difference or greater: This difference means that you are a C cup or higher and you will need to make a full bust adjustment (FBA). Select your bust size from the pattern’s size chart based on your high bust measurement. This will ensure that the garment fits properly in the neck and shoulders and the FBA will increase your cup size.
Determining the amount to adjust your pattern:
FBA
Example measurements: High bust: 37”, Full bust: 40”
I’ve determined that I’m a 3” difference between my high bust and full bust. I’ve selected my bust size for my pattern based on my high bust measurement (size 8).
Now, take the difference between your high bust and full bust (3”) and divide in half (1.5”). We are dividing the measurement in half because we are working with half of the dress pattern.
When we make our adjustments, we’ll be spreading our piece out to build in 1.5” at the bust.
SBA
Example measurements: High bust: 34”, Full bust: 35”
I’ve determined that the difference between my high bust and full bust is 1”. So I’ve selected my a pattern size based on my high bust measurement (size 4).
Now, take the difference between your high bust and full bust (1”) and divide the amount by half (e.g.: 1/2”). We are dividing the measurement in half because we are working with half of the dress pattern.
When we make our adjustments, we’ll be shifting our pieces in by ½” at the bust.
Bust adjustment tutorial:
For this bust adjustment, whether you’re making a small or full adjustment, you will start out the same way. When we get to step 4 and we’re ready to increase or decrease the pattern, I’ll give one set of instructions for FBA and one for SBA.
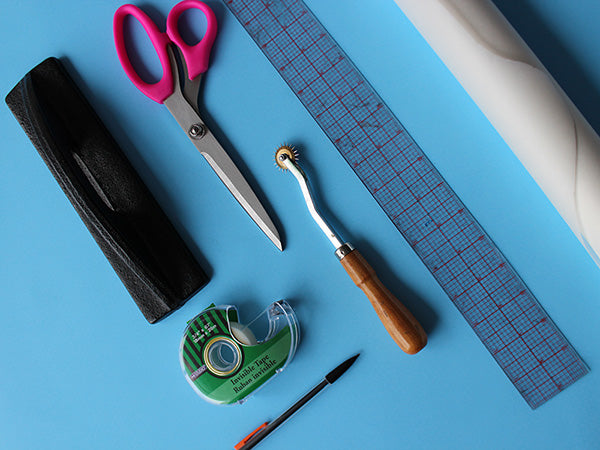
Tools:
- Clear drafting ruler
- Paper scissors
- Pen or pencil
- Tape
- Paper weights
- Tracing paper. We’ll be making some hefty adjustments, so get something durable. Tracing the pattern. Swedish tracing a paper is a treat to work with as you can also sew it up to check your fit.
- Make sure to trace all pattern markings to your traced Dress Front pattern piece.
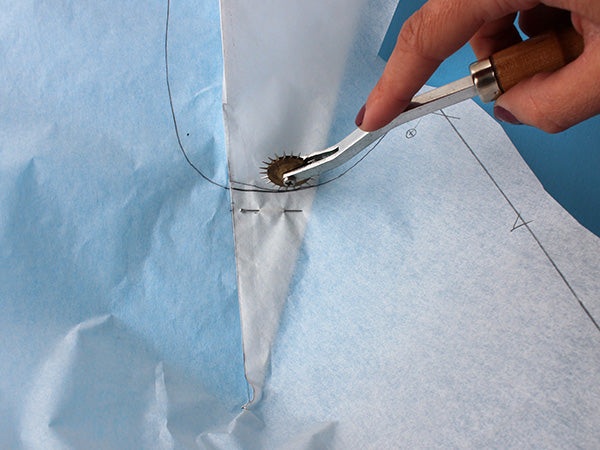
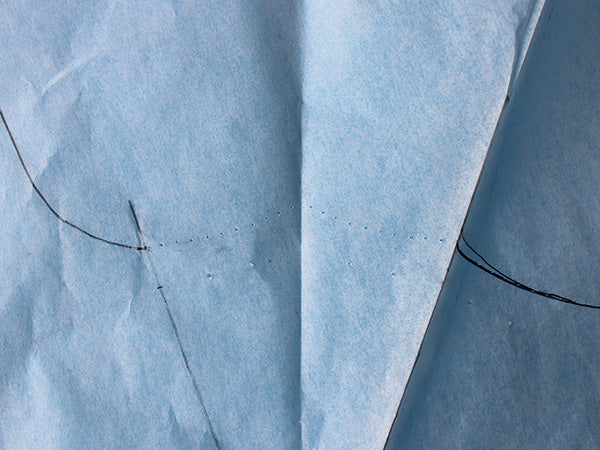
- Tracing wheel for truing your dart
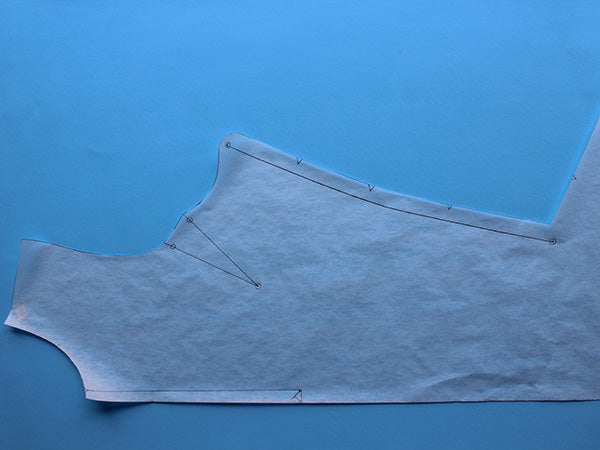
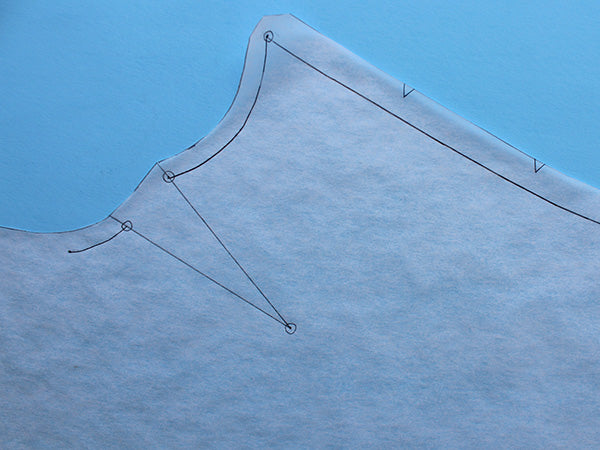
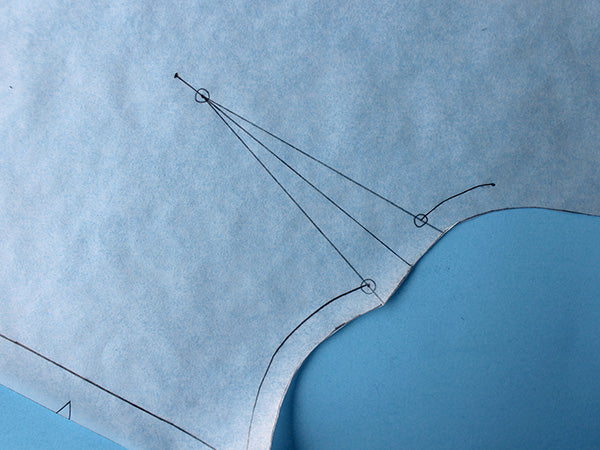
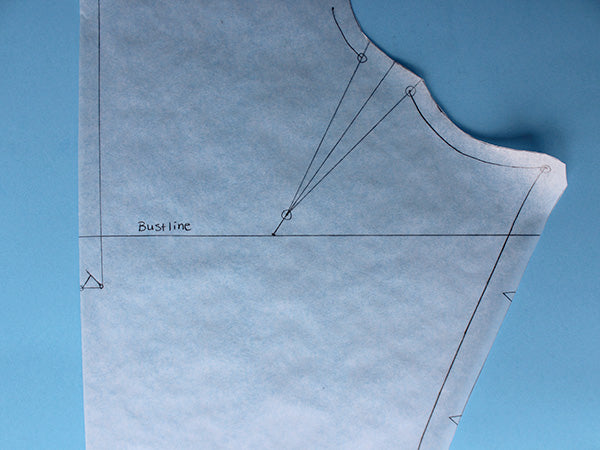
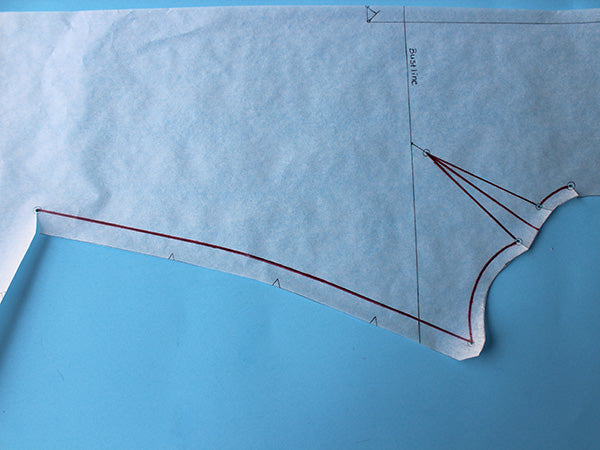
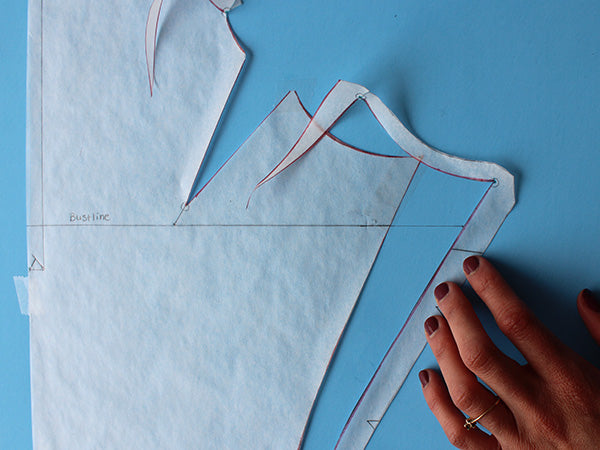
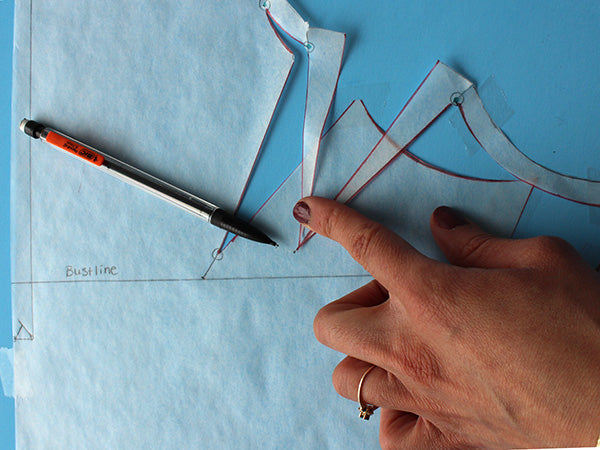
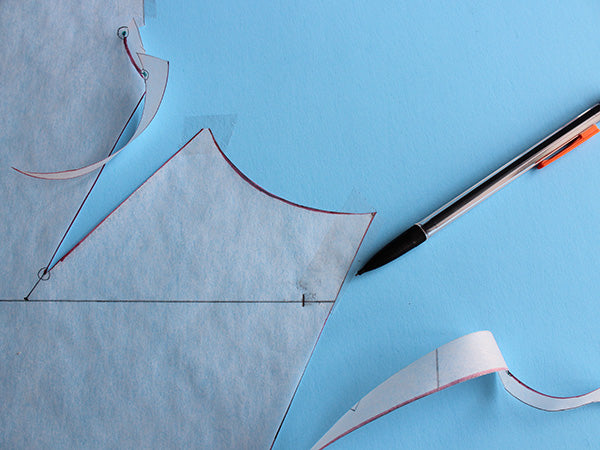
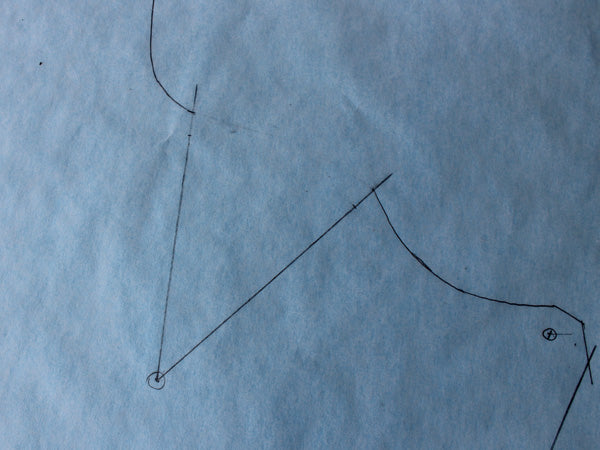
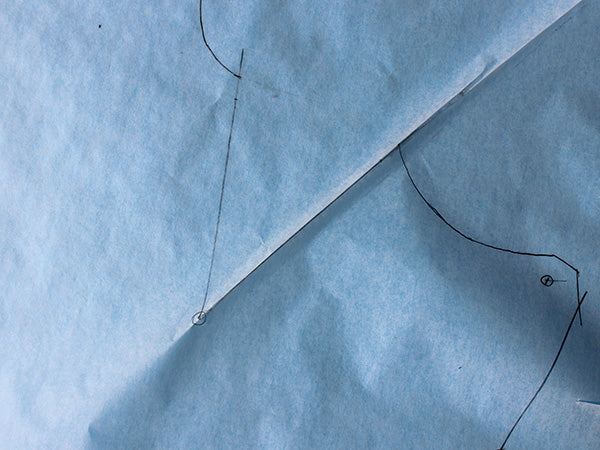
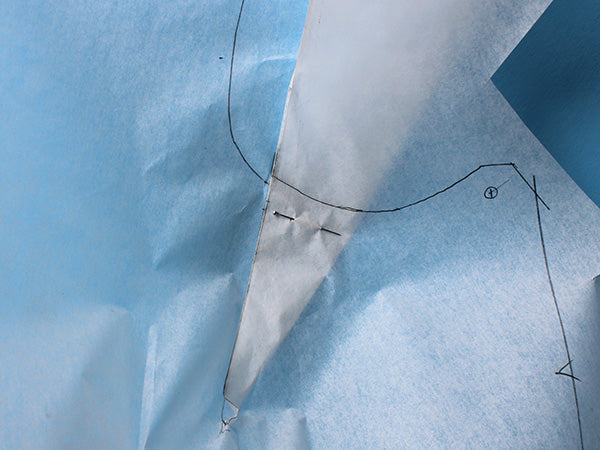
Step 1: Mark your pattern

Leave a comment