

Written by Elizabeth Vandermey
We all have that trunk, closet or drawer that is overflowing with scraps of fabric left over from previous projects. Too beautiful to throw out and yet too small for another project, these forgotten bits of fabric tend to sit collecting dust. But despair no more for we have the perfect solution! Sewers grab your collection of fabrics and prepare to be very busy creating multiples of the following tutorial as it is both a fun and functional way of using leftovers.

MATERIALS:
Two fabrics, outer shell, and lining
Buckrum (this is used to add structure)
Thread
Ruler
Scissors
Pencil
Compass
CREATING YOUR PATTERN:
Begin by drafting a circle on paper to whichever diameter you desire, using a compass as an aid. Add a seam allowance of ½” to the circumference of the circle.
Next draft a rectangle that is long enough to fit the entire original circumference of the circle, the height of the bucket is entirely up to you. Add ½” seam allowance to all sides.
Cut out all necessary pattern pieces: For both the circle and rectangle, cut one outer shell, one lining, and one buckrum layer.
RECTANGLE:
Layer the fabrics as follows:
- Buckrum
- Outer shell wrong side facing buckrum, right side facing up
- lining right side down onto outer shell

Sew along one long edge of the rectangle at ½” seam allowance – attaching all three layers together.

Lay the fabric down onto the ironing board with the lining on one side, and the exterior fabric and buckram over on the other side. Press the seam open with the seam allowance pressed towards the lining. Then, under-stitch the seam allowance onto the lining at 1/8” from the seam.
If you need a little help with under-stitching, here's a previous tutorial

Next! Place right sides together - joining the shortest edges, and sew at a ½” seam allowance.
After sewing the seam, you will then under-stitch the seam allowance onto the lining side. To access this seam as the project is now a tube, remove the platform from your sewing machine so that you have access to the free arm. Once again, sew the stitch about 1/8" from the seam, sewing the seam allowance down towards the lining side. 
The cross-section where both seam allowances meet is going to be incredibly bulky at this point. To reduce the bulk, clip the seam allowance at a 45° angle. Trimming excess seam allowance will create a more desirable effect on the exterior of the bag.
Now, turn the tube right side out so that the wrong side of the lining is facing the buckrum. Pin layers together along the un-sewn edge. Serge or zig zag all layers together.
CIRCLE BASE:
Now it is time to work on the bottom of the bag!

Layer the fabrics as follows:
- Outer shell right side down
- Buckrum
- Lining right side up
 Either side of the bag base
Then, serge or zig zag all layers together. This will protect the edges from fraying and will also hold everything together - therefore performing two steps in one!
ATTACHING TOGETHER:
Next, we will attach the circle base to the rectangular walls. With the lining fabric facing outwards, attach the two pieces together. Place the circle down first and then the cylinder on top. Pinch the edges together and pin. Sew the pieces together at 1/2" seam allowance. 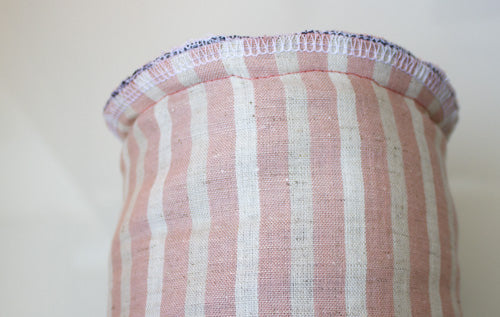
This area is particularly tricky to execute because there's a bit of easing involved when sewing a curved edge to a straight edge. Don’t be discouraged if your stitching ends up looking slightly wonky. As long as the majority of the stitching is consistent, the overall aesthetic will not be affected.
Next, flip the bucket inside out and press along the base seam
And Voila! Your bucket bag is assembled and ready to be filled.
YOU MAY LIKE:

Leave a comment