

PDF patterns are an instant option for accessing your sewing patterns. You can print them on your home printer and assemble them to create a full scale sewing pattern. Our pattern also come with a print at copy shop version, which can save you time.
In this post we'll walk you the assembly of your PDF pattern. If you're new to assembling PDFs, this post will guide you through the process. If this isn't your first time, follow along with us as there's always new tips to learn.
Before we get started, I'll just remind you that our patterns come with the option to print at the copy shop and both 36" and A0 formats are included.
Once you have assembled the PDF, you can choose to cut out your pattern pieces, or you may wish to use the assembled PDF as a "hard copy" and trace out the pieces. Tracing allows you to make the pattern in another size if you wish to.
First, let's gather the supplies needed for assembly.
Note: Here is a Canadian source if you prefer to use a copy shop to print your sewing patterns
PDF Assembly Supplies:

- Cutting tool: I prefer a rotary cutter but a craft knife will work great as well. I do not use scissors when trimming edges, as there is too much room for error. If using a rotary cutter, you can make use blades that are too dull to cut fabric.
- Cutting mat: You will need to protect your table surface when using cutting tools.
- Magic tape: to secure pages together.
- Metal ruler with a cork back: The metal edge means that you won't cut into the ruler with your blade and the cork back prevent the ruler from slipping as you cut the paper edges.
Printing Your PDF:
Our PDF's are automatically saved to print with a default of "No Page Scaling," but just to make sure, double check that "No Page Scaling" is selected on your end when printing.

If you want to save on ink, change the print resolution setting to a lower dpi or if your printer has a draft mode, you can select that. This setting will lower the quality of the print, but it should still be visible enough for our purposes.
Checking the scale of the pattern:
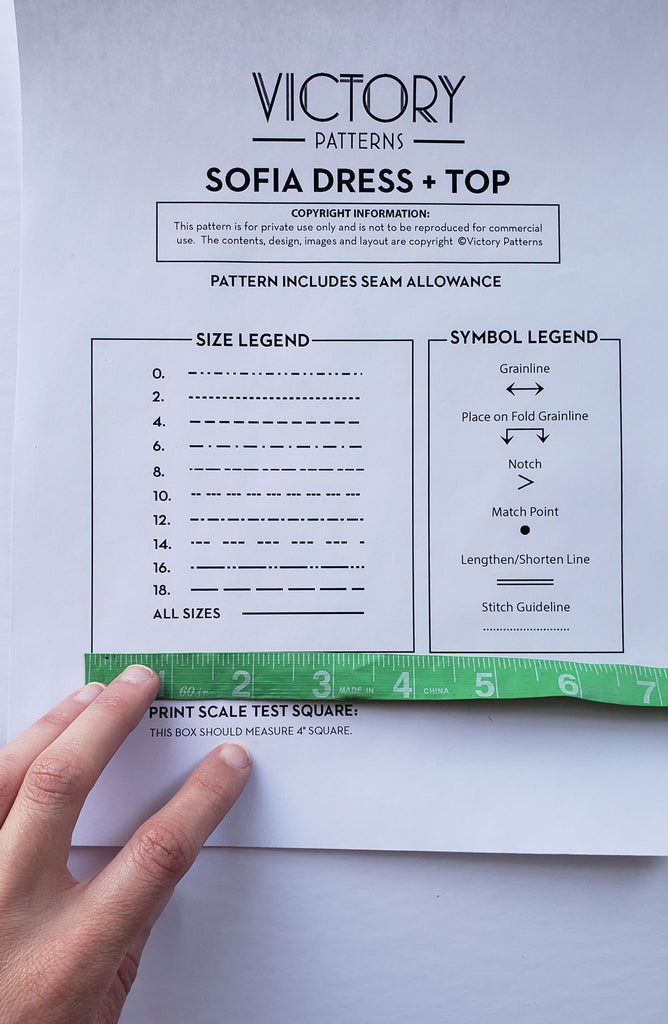
Before printing the whole pattern, I would suggest selecting the first page to print before printing the whole pattern. On this page, you'll find a scale test square that can be measured to ensure the correct print scale. The scale test square will also allow you to see if the print resolution that you've selected is visible enough. Once you've confirmed that everything looks good, go ahead and print the rest of your pattern.
Assemble the PDF:
You can refer to your pattern assembly page in your pattern instructions. This guide will give you an overview of the page arrangement. You can choose to break the sheet up into smaller sections if the PDF layout allows for it.

Example: The Jackie Dress Assembly Diagram
Separate the pages by row:
I find it easiest to break the pages into into piles according to their common registration marks. For example, the first pile will have registration marks along the longer side of the page that begins with a 1, the second pile will begin with a 3 and so on. From there, let's trip the edges from each pile. 
Trim the edges:


Assemble each row separately:
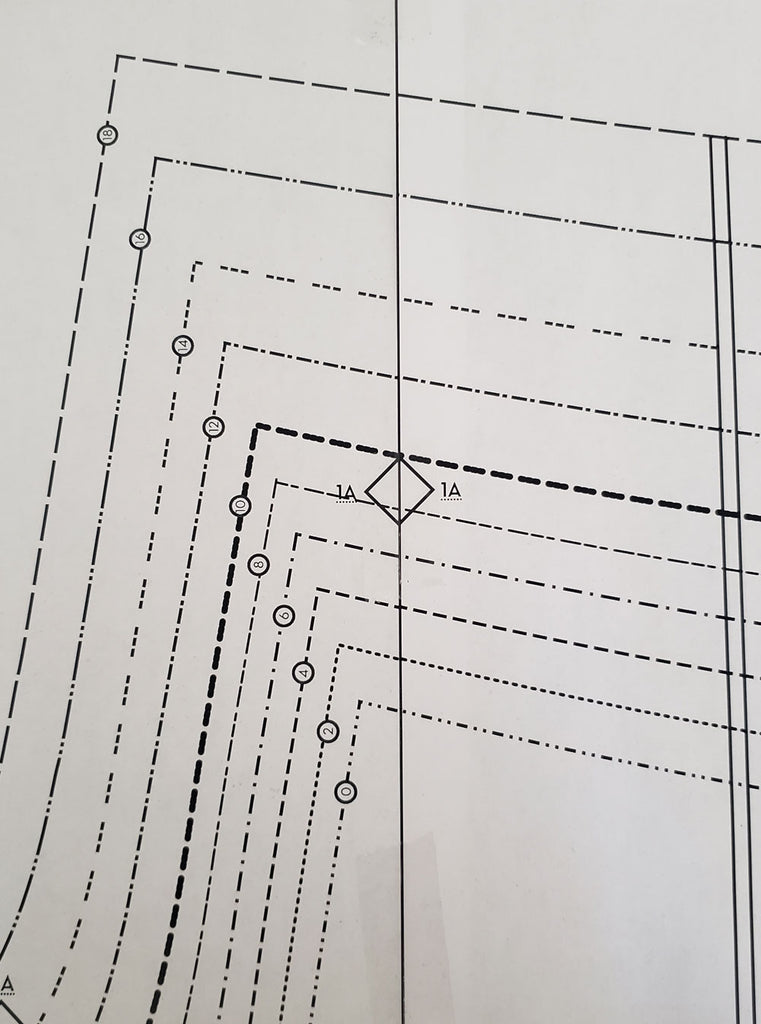
Use the registration marks to match the pages by aligning the diamond marks from corresponding pages (Example: 1A will match to 1A on the neighbouring page).
I highly recommend using tape instead of a glue stick. I've found that glue tends to dry out and lose it's bond over a short time.
Tape the pieces together, constructing each row separately. When taping, I use small pieces at either end as well as the middle of the adjoining pages.

Attach the rows together:
Once all of the rows are assembled, use the registration marks along the top and bottom page edges to align the rows together.


Pattern usage options and additional taping:
If you're cutting the pattern pieces out directly from the assembled PDF, you will want to add a piece of tape where a pattern line meets two overlapping pages.
If you want to maintain your assembled PDF as one large sheet, which you will trace from, I would suggest turning the pattern over onto the wrong side and taping at the page intersections.
If you're tracing, yet you want to break the down into smaller pieces making it easier to store, you can rough-cut around your pattern pieces. Before you do, make sure to add a piece of tape at spots where a pattern line meets two overlapping pages. Otherwise, these will separate when you cut the pattern out.

YOU MAY LIKE:

Leave a comment