Fancy Seams tutorial

The type of seam that choose to sew can not only make a garment look beautiful from the inside out, but they can also enhance the life of a garment, as well as your pride in what you've made. This little guide will give you a basic rundown on a few seam finishes starting with the basics, and then we'll get into the fancy stuff! I'll give you some pointers as to when to use each seam finish. When you make clothing with beautiful seams, you'll be so much happier wearing it!
Zig Zag: A plain seam needs to have a zig-zag stitch or serge along the raw fabric edges to prevent fabric fraying and to improve the longevity of your garment.

- Prior to constructing the garment, sew a regular zig-zag or serge stitch along the fabric edges of each pattern piece.
- For a zig-zag, set the stitch width to 4, and stitch length to 2.5. The stitch should be sewn very close to the fabric edge. preferably, the zig-zag will encase the edge.
_________________________________________________________________________________________________
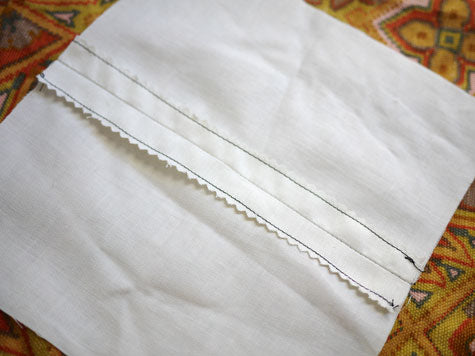
Stitched & Pinked: A plain seam finish used as an alternative to a zig-zag finish. Suitable for fabric with a tighter weave that does not unravel easily.

Materials: Pinking shears
- Stitch ¼” along either edge of the seam allowance and press seam open.
- Trim close to stitching with a pinking shears scissors. Be careful not to cut the stitch.
_________________________________________________________________________________________________
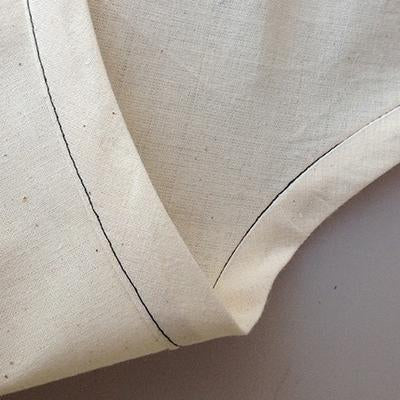
Turned & Stitched: Another way to finish the edges of a plain seam. This finish is most suitable for light to medium weight woven fabrics. The technique for sewing with straight and curved seams vary.

Straight Seams:
- Construct a plain seam. Fold seam allowance edges in at ¼” towards the wrong side and press. Sew 1/8” from the folded edge.
Curved Edges:
- Construct a plain seam. Along each seam allowance edge, sew a *straight stitch 1/8” away from the fabric edge. This stitch line helps the fabric edge to fold along the curve.
- Turn fabric towards the wrong side, folding at the stitch line and press.
- Sew along seam allowance close to the folded edge from the right side.
_________________________________________________________________________________________________
French Seam: An encased seam that is ideal for delicate and sheer fabrics. The raw edge is enclosed to prevent the fabric from fraying. This seam also gives a professional finish to your garment. Avoid using this seam finish with curved seams as it will buckle. Suitable for light to medium weight fabrics.
After constructing the seam, you will not be able to alter the fit of the piece along this seam.
- With wrong sides of fabric together, sew at 1/4” seam allowance. Trim seam allowance to 1/8”.
- Press along the seam.
- Fold fabric right sides together with stitching line exactly on the fold. Press along the folded edge.
- On the wrong side of the fabric, stitch 3/8” from the fold, encasing the trimmed seam allowance.
- Press seam allowance to one side.
_________________________________________________________________________________________________
Fake French Seam: Used when a French seam is desired, but you want the ability to adjust for fit. To make life easier, make sure the garment fits you just the way you want it before proceeding past step 1.

- With fabric right sides together, sew a plain seam using regular seam allowance. If seam allowance is more than ½”, trim it to ½”.
- Press each seam allowance in at ¼” towards the first seam. The seam allowance edges should meet the seam.
- Match folded edges together.
- Sew through all layer of the seam allowance, about 1/8" from the folded edge.
- Press seam to one side of the garment.
_________________________________________________________________________________________________
Self Bound Edge: A clean finished seam. This seam works best with lightweight fabrics that do not fray easily.

- Construct a plain seam.
- Trim one side of seam allowance to 1/8”.
- Turn the other seam allowance edge in at 1/8” and press.
- Turn again and match the folded edge to the seam line, enclosing the trimmed seam allowance.
- Stitch folded edge close to the original stitch line.
_________________________________________________________________________________________________
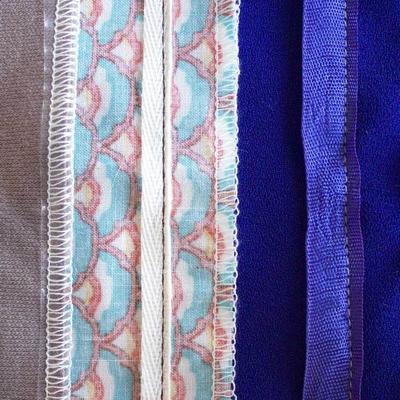
Bias Bound Seam Finish: This is the most simple bound finish. Used commonly on unlined coats and jackets, or along hem or facing edges. You can purchase bias binding or create your own from lightweight fabric.

Materials: Double fold bias binding or self-made binding
- Construct a plain seam.
- Encase raw edges in double folded bias tape placing the narrow edge of binding along the right (top) side of seam allowance and the wider side of tape underneath.
- Sew through seam allowance and binding layers, stitching close to the edge of the binding.
_________________________________________________________________________________________________
Hong Kong Seam Finish: An alternative to bias bound finish and used for the same purpose.

Materials: 1 ½” bias binding or self-bias binding
- Construct a plain seam.
- Cut binding the length of the seam to be finished. Use a 1 ½” wide bias strip from lightweight fabric or use single or double fold bias tape and press open.
- With right sides together, stitch bias tape together to with the seam allowance at ¼”.
- Wrap binding around the raw seam allowance edge, turning the bias strip to the underside of the seam allowance.
- On the right side of seam allowance, stitch along the crevice of the first seam line.
- On the underside of either seam allowance, trim the excess binding.
_________________________________________________________________________________________________
Flat Felled: This seam gives a clean finish to both sides of the garment. It adds durability to the seam and decreases abrasion. There is one row of stitching on the outside of the seam. Commonly used in denim and sportswear.

- Construct a plain seam.
- Press seam allowance to one side.
- Fold both seam allowance edges at ¼” and lay flat onto garment.
- Stitch through all fabric layers along the edge of the fold, about 1/8” from the edge.
_________________________________________________________________________________________________
Slot Seam: A decorative seam where a strip of matching or contrasting fabric is added to the underside of the seam. Either side of the seam is topstitched onto the under layer, and the basting stitch from the first seam is removed to reveal the backing strip underneath the finished seam edges.
Materials: Contrast fabric
- Baste a plain seam and press open.
- Cut a fabric strip ¼”wider than both seam allowances and as long as the seam.
- Centre the strip onto the seam allowance.
- Topstitch ½” (or less as desired) along either side of seam.
- Removed original basting stitch to reveal contrast strip.
YOU MAY LIKE:
1 Response
Leave a comment
Comments will be approved before showing up.
Also in Sewing Tutorials

How to stitch in the ditch

How to gather fabric


James
October 17, 2023
Plain seam