


Shirring is one of those techniques that looks like magic and feels intimidating right up until you understand what's happening at the machine. Rows of elastic thread gather the fabric into a stretchy, comfortable panel. The trick to successful shirring is in setting up your machine and thread correctly.
This guide covers the whole thing: winding the bobbin, threading, getting the tension right, testing before you commit, and troubleshooting when the stretch isn't quite right. I'm demonstrating on the bodice of my Sofia dress pattern, which is built around shirring, but everything here applies to any shirring project.
If this is your first time shirring, I also recommend watching the tutorial video I've created. It shows you everything you'll need to know for sewing this technique.
Here's what we'll cover in this post:
- How to thread your machine
- Machine settings
- Testing your shirring and troubleshooting
- Sewing the Sofia bodice
Threading the Machine:
The upper portion of the machine is threaded as usual. The bobbin is where we change things up, because it's wound by hand with elastic thread. Using the machine's winding mechanism would create too much tension and affect the shirring result.
When winding, you want to keep some slack. Don't pull too tightly, as you don't want to engage the stretch in the thread. Give it just enough tension as you wind that the thread isn't falling off the bobbin.

You'll need several bobbins of elastic for this project, so winding a few before you start will make your workflow more efficient.

Place the bobbin into the case and thread it as you would with regular thread. Once it's in the case, pull on the thread and take note of the tension. It shouldn't feel too loose or too tight as you draw the elastic thread from the case. If you run into either of these issues, you'll need to adjust the bobbin tension.
To adjust bobbin tension on a machine with a removable bobbin case, there is a screw on the outside of the case that controls the bobbin thread tension.
On a machine with a drop-in bobbin, you can still adjust the tension, but you'll need to look into your machine's model to learn how to access the screw. Here is a video that may be helpful to get you started.
Locate the small screw on the outside of the bobbin case. If the thread is very loose as you pull it from the case, turn the screw to the right by a quarter turn. If the thread is very tight as you draw it out, turn the screw to the left by a quarter turn.

It's important to know that the screw post is very short, so make your adjustments in small rotations. Work over a tabletop so that if the screw falls out, you can easily find it.
Don't forget to return the screw to its original position after you've finished shirring; otherwise the adjusted tension will affect your regular sewing.
Machine Settings:
Stitch Length:
Use a straight stitch with the length set between 3.5 and 4 mm. The longer the stitch length, the more fabric is taken up per stitch, which means more gathering. Test your stitch length and adjust if necessary.
Upper Thread Tension:
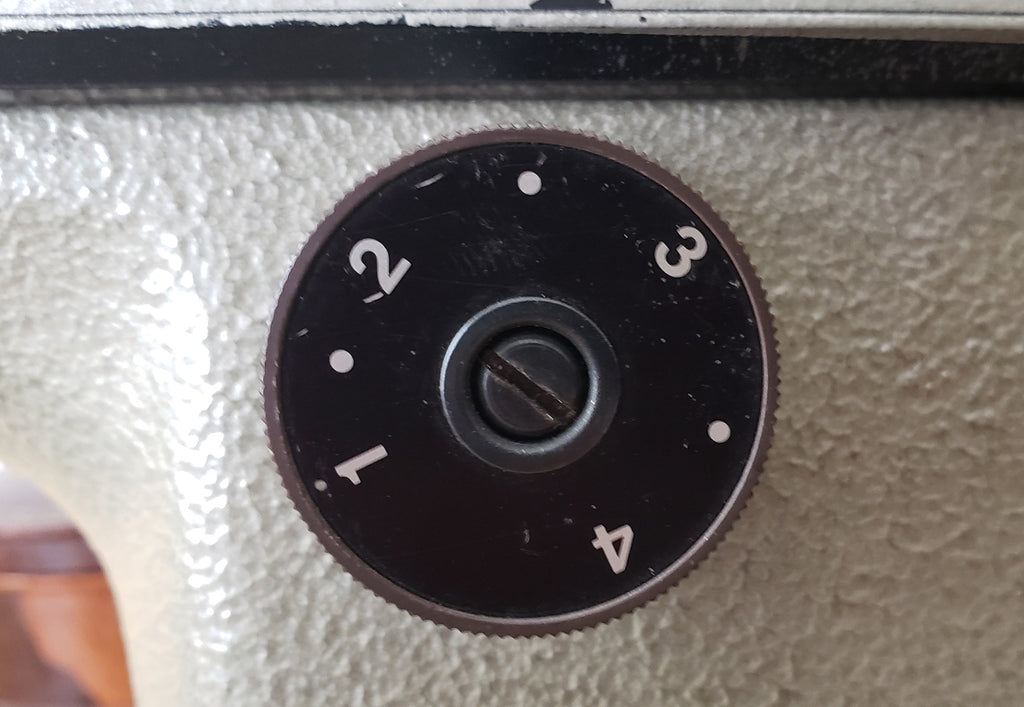
Your upper thread tension can be adjusted to achieve more or less stretch. Start with a middle tension of 4. Increase the tension to create more gathers and stretch, or decrease it to relax them.
The elastic thread should lie flat on the back side of the fabric, and the upper thread should hold it securely in place.
Here is a diagram of how your upper thread and bobbin thread should look from a side view. It's quite different from tension with regular thread. Since the elastic is thick, it cannot pull through the weave of the fabric; that would make it visible on the right side, which isn't a good look.

This image shows shirring from the elastic side. This is correct shirring tension. You can see that the elastic lies flat.

This image shows incorrect tension. Although the elastic lies flat, the upper thread is loose and the shirring will not hold in place.

Testing:
Before you begin shirring your project, I highly recommend practicing on scrap fabric and testing to make sure you're getting enough stretch. I aim for about 50% stretch, which means that if you shirr a piece of fabric that is 10" wide, it should stretch to about 5", give or take.
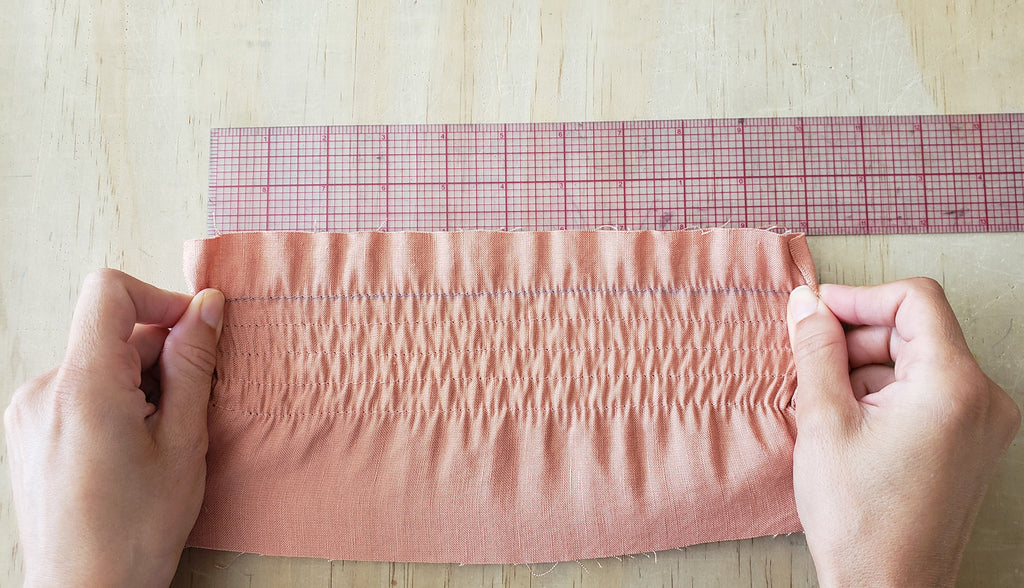

Troubleshooting Solutions:
If you aren't seeing enough stretch, or if there is too much, here is a short checklist of solutions to try:
- Increasing your stitch length will increase the stretch (it takes up more fabric per stitch).
- Decreasing your stitch length will reduce the stretch (it takes up less fabric per stitch).
- Check that the bobbin is wound properly.
- Tighter bobbin tension will result in more stretch. To reduce stretch, reduce the tension (turn the bobbin case screw to the left).
- Higher upper thread tension will increase stretch.
- Lower upper thread tension will relax stretch.
Once you have everything set up correctly, it's time to get started on shirring the bodice.
Preparing the Bodice for Shirring:
-
Finish the upper edge of the Bodice (A) with a serge or zigzag stitch.
-
Turn the upper edge towards the wrong side by 1 1/4" (3.2 cm). Press the folded edge and pin in place.


Prepare the Crop & Peplum Top Hem
Before sewing the shirring, we'll prepare the hem for the top versions. The hem will be sewn in a later step, but pressing it now is much easier while the fabric is flat.
- Pre-press the hem edge of the crop and peplum top pieces. Turn the hem towards the wrong side by 3/8" (1 cm) and press. Turn the edge in again by 3/8" (1 cm) and press again.


Shirring Guidelines
Now it's time to start shirring. One crucial feature of successful shirring is that the rows are evenly spaced as you sew. The spacing between each row will be 1/2" (1.3 cm). To achieve even spacing, you can either use a presser foot that allows for this spacing (the edge of the foot should sit 1/2" (1.3 cm) from the centre of the foot), or you can draw guidelines on the fabric.
If you don't have a presser foot with this spacing, here's a tutorial that will show you a quick DIY hack for changing your regular foot into a 1/2" guide foot. This is what I'll be using in this tutorial.

If you prefer to mark your fabric with a ruler and chalk, here's how to do it.
- First, lay the bodice piece right side up and align the hem or waistline edge with the edge of the table; this helps keep the grainline straight.

- Begin by marking along the upper edge of the bodice with a ruler and chalk. The first line will be 1/2" (1.3 cm) away from the folded edge.

- Continue drawing lines along the bodice, spacing them 1/2" (1.3 cm) apart.
The notch along the side edge indicates the placement for the last shirring stitch line.
- Crop top: the last shirring line should be approximately 1 3/4" (4.5 cm) away from the hem edge.
- Peplum: the last shirring line should be approximately 7" (18 cm) away from the hem edge.
- Dress: the last shirring line should be 1/2" (1.3 cm) away from the waistline edge.

Shirring:
-
Make sure to bring the elastic thread up, and bring both threads underneath the foot.

We'll start by sewing the first two rows of shirring along the upper edge of the bodice using the backstitch method, which simply means sewing a strong backstitch at the beginning and end of each stitch line.
These two rows do double duty: they secure the upper edge of the bodice in place, and they form a casing for a strip of elastic that will be added later in the project. Let's get started.

Begin sewing with the bodice right side up. The first shirring stitch will be sewn 1/2" (1.3 cm) away from the bodice's folded upper edge. Begin and end the stitch with a backstitch.


- The second line of stitching will be sewn 1/2" (1.3 cm) from the first row. You can now use the guide on your foot to align with the first line of stitching. If you are using chalk guidelines, carefully follow the lines as you sew.

- It is essential to stretch the fabric flat in the area you're sewing; this prevents puckers from forming along the stitch line.

- Once these stitches are sewn, you will have hemmed the upper edge of the bodice and created a channel for the elastic, which we'll insert in a later post.

- Now we'll begin sewing along the side edges of the bodice. The remaining stitches are sewn using the continuous shirring method, meaning all the rows are sewn in one continuous stitch.
Note: if you run out of bobbin thread as you sew, reload it and begin sewing a few stitches over the end of the previous stitch line. Sew a small backstitch and continue shirring.
- The first stitch will begin 3/8" (1 cm) down from the curved underarm edge.

-
At this point, we're sewing alongside a curved edge. If you're using the guide foot, align the second shirring line with the 1/2" line on your machine's guide plate until you can align your guide foot with the stitching.

-
Stretch the fabric out as you sew, and be careful to sew in straight lines.

- Once you reach the other side of the bodice, aim to sew 3/8" (1 cm) down from the curved edge.

-
Stop the stitch 1/4" (6 mm) away from the side edge. Lift the presser foot

- Pivot the foot in the direction of the side edge.

- Reduce the stitch length to 2.5 mm. This shorter stitch length reduces the shirring stretch and lets you "skip" to the next row without shirring the side seam edge.
- Sew 6 to 7 stitches along the side edge, so that you're now 1/2" (1.3 cm) away from the previous shirring row.

- Increase your stitch length back to your previous shirring setting.

-
Continue sewing the next line of shirring, and sew the whole bodice using this method.

-
Remember: for the dress, the final stitch line sits 1/2" (1.3 cm) from the waistline edge. For the crop top, the last line should be approximately 1 3/4" (4.5 cm) from the hem edge, and for the peplum, about 7" (18 cm) from the hem edge.

- For the dress bodice, as you sew this last line, keep in mind that it's more important for it to sit 1/2" (1.3 cm) from the waistline edge than to be evenly spaced from the previous stitch line.
You'll notice on my project that the mark on the left side of my guide foot doesn't align with the previous shirring stitch, but the mark on the right side aligns with the waist edge. It's almost impossible to be perfectly even in the stitch spacing, so when you get to this last stitch, be lenient with yourself :) Having the last stitch spaced 1/2" from the edge will help us later when we attach the skirt.

Congratulations! You've finished shirring the bodice!
This post is part of the Sofia sewalong, so if you're sewing along, here's where to go next. If you're making the bishop, cap or elbow sleeve, we're not done with shirring just yet. You can jump over to this post to sew shirring on the Sleeve.
If you're making the bell sleeve, first complete the bodice by following this post, and then move on to completing the Bell sleeve.
And if you'd like to sew this dress yourself, you can find the Sofia Pattern here. It comes in dress, crop, and peplum versions, and the shirred bodice you've just learned is the heart of all three.
If you enjoyed this tutorial and want to keep it close at hand, save this pin to your Pinterest sewing board...

YOU MAY ALSO LIKE:

Leave a comment